Monday, June 24, 2013
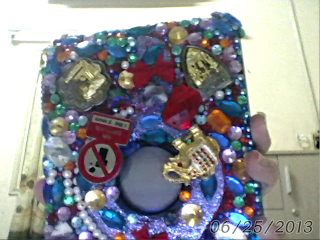
I just made my every own rhinestone Galaxy Tab 2 case!!!!!!!!!
Last week I just made my new rhinestone case for my Galaxy Tab 2 7.0! I picked out several items from my keychain collections and bought alot of rhinestones and made this case! Hope you like it, I've spent 2 days working on this!
Front:
Back:
Materials:
-Rhinestones with different sizes and colors
-Pieces to glue on(big and small)
-Pearls (flat backs or round is up to you)
-Case
-Tweezer
-Super Glue
-Newspapers or mat
LET'S GET STARTED!!!!
Step 1:
Organize the pieces to see if it suites what you wanted, start gluing them using super glue WARNING: EXTREMELY CAREFUL WITH THE SUPER GLUE,IF IT GOT ONTO YOUR HANDS IT WILL PEEL YOUR SKIN WHEN YOU TRY TO GET IT OUT!
Step 2: Start adding rhinestones one by one, add the small and the big ones to make it evenly pretty, then add the pearls, use plenty of glue for the round ones and less for the flat ones, continue adding until you reach the stage that you wanted it to be look like.
Step 3: Add the small rhinestones on the edges, using a tweezer to pick it up.
Step 4: After you have covered the case with rhinestone, wait for about 1 hour t dry completely and then you can use your case, but handle it carefully because you don't want any rhinestone to fall off, if it do, apply them back own.
NOW YOU HAVE A BEAUTIFULLY HANDMADE RHINESTONE CASE, IT IS MUCH MORE WORTH IT THAN BUYING A CASE ON THE INTERNET OR THE STORE FOR ABOUT $200.
Subscribe to:
Post Comments (Atom)


No comments:
Post a Comment